MyVote - How to Add PNMs in MyVote
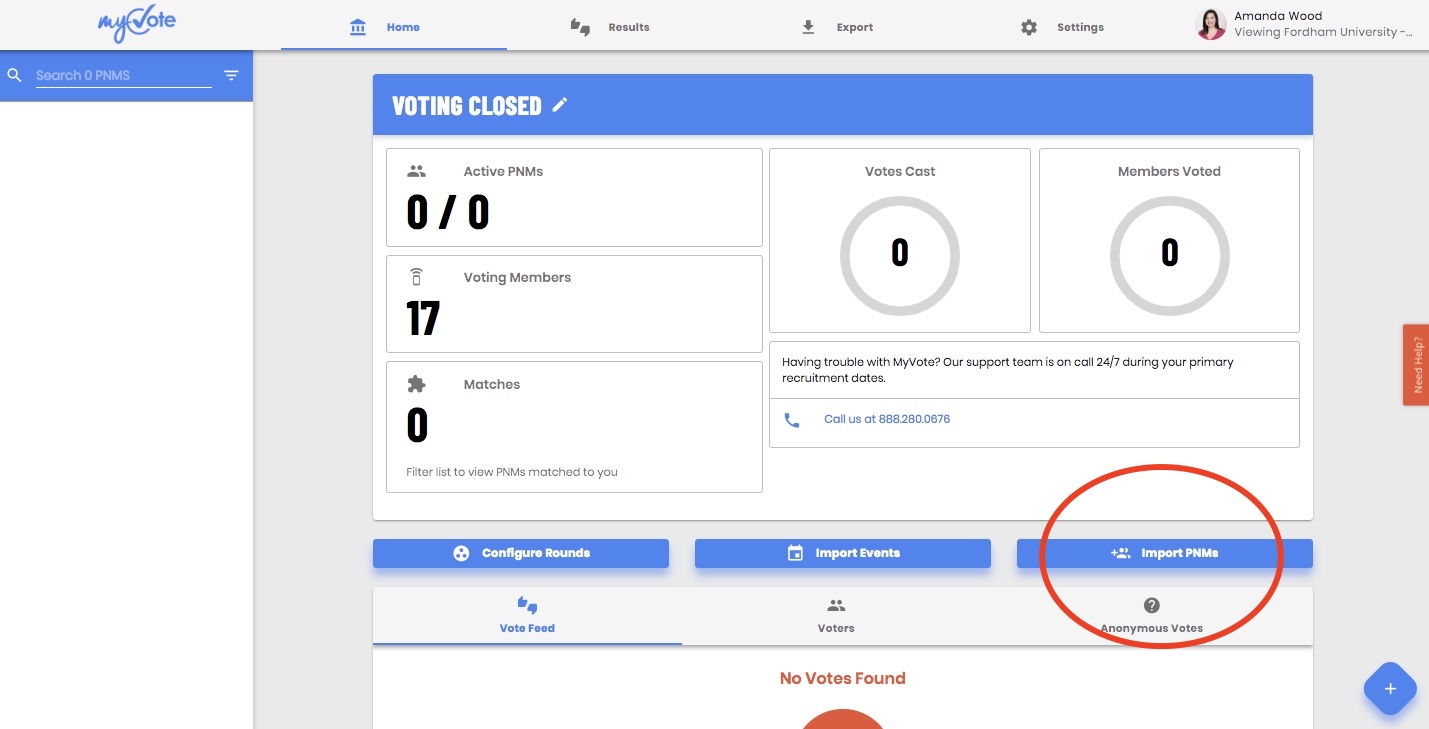
To upload PNMs for COB mode or from ICS, select Import PNMs from the home screen as seen below or by selecting the blue plus sign button in the bottom right corner and selecting Import PNMs.
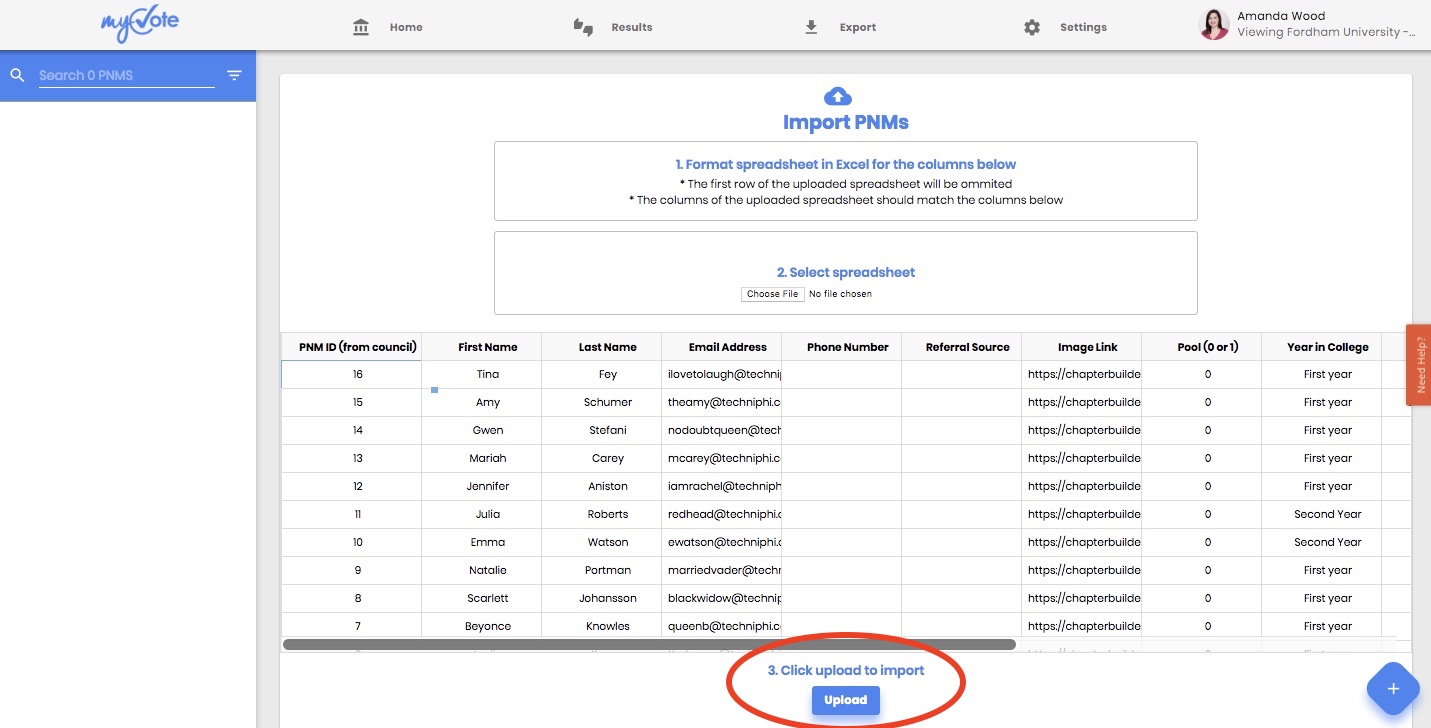
Select 'Choose File' and select the file to upload from your computer:

Once the file is selected, a Column Matcher will appear so that you can match the columns with the data and fields you set up. Your fields must be set up before uploading PNM information.

Once the columns are saved, you can preview the PNM data from your spreadsheet within MyVote. Make sure your PNM data matches the correct columns in MyVote BEFORE selecting the Upload button. If your information is correct, select Upload at the bottom of the page.
Reminders for Importing PNMs
The PNM ID # is the most important field. This is the identifying factor between PNMs in MyVote. Any time you import PNM data, you MUST use the same PNM ID# that was used when uploaded.
Fields can be left blank if no data is available.
If you are using a primary and secondary pool, the primary pool is labeled as 0 and the secondary pool is labeled as 1. If you do not use multiple pools, label all as 0, or leave that column blank.
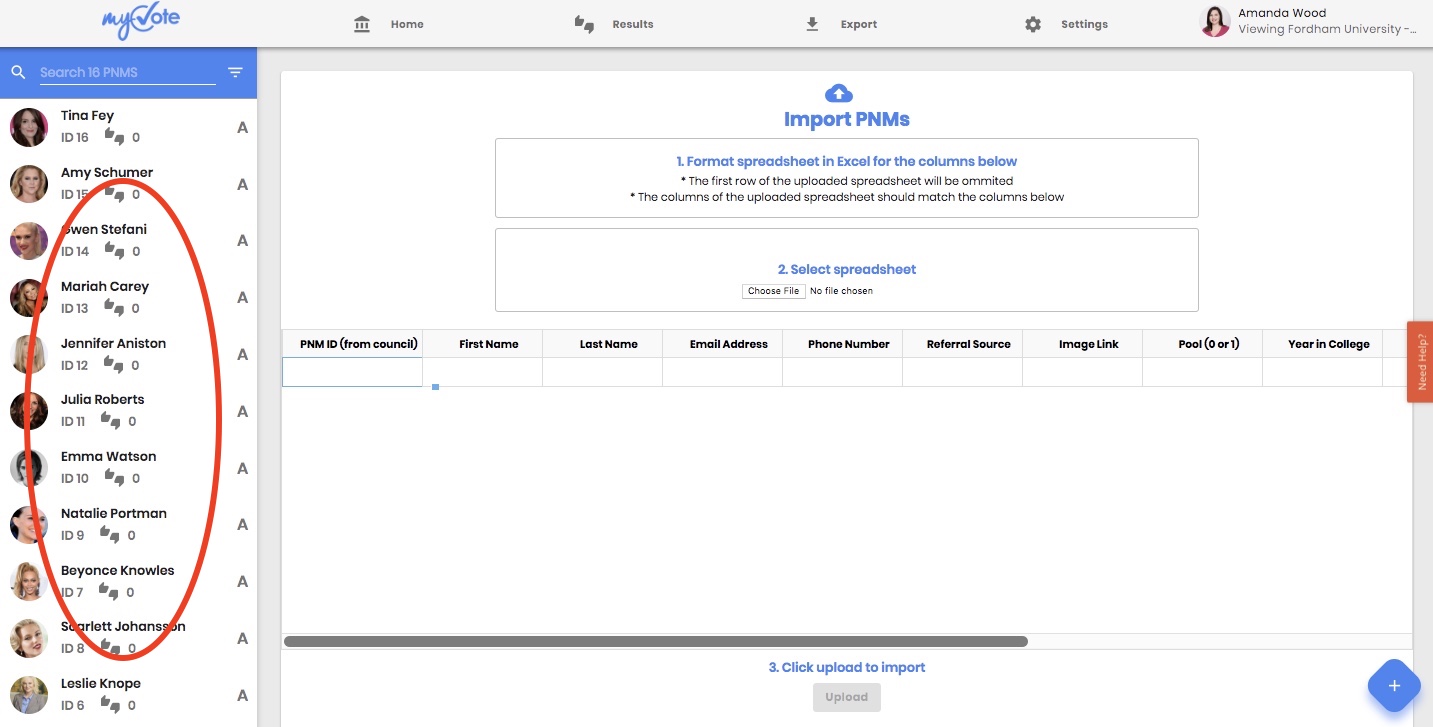
Once uploaded the PNMs will appear on the left side of the screen in the PNM List.
WARNING: If your council uses CampusDirector, you do not upload PNMs for your Primary Recruitment. MyVote will sync all PNM Data with CampusDirector.
Related Articles
MyVote - How to add PNMs to COB Mode
To upload PNMs for COB Mode, or from a recruitment management technology that is not CampusDirector, select Import PNMs from the home screen as seen below or by selecting the blue plus sign button in the bottom right corner of your screen and ...MyVote - How to add a single PNM to MyVote
If you want to add a single PNM to your MyVote account, you can easily do that by clicking the blue plus sign button in the bottom right corner of your screen. Note, you can only add PNMs to your MyVote site if you are in COB mode or if you are not ...MyVote - How to Add Users to Your MyVote Account
To add users to MyVote, click on the Settings tab in the top navigation bar, then click the Users. There are three user types in MyVote: Technology Team - This user has full admin access to the chapter accounts. When the term Admin is used, it refers ...MyVote - MyVote Recruitment Set-Up Checklist
Follow these steps to ensure you are ready for recruitment! We recommend ensuring your site is ready at least 2 weeks before recruitment starts. Learn MyVote- As a chapter admin, you must be versed in how to use MyVote. There are many options of how ...MyVote - What is Advanced Matching?
Looking for an easier and proven way of pairing your members to PNMs during recruitment? MyVote’s Advanced Matching feature makes this process easier by taking registration data, member recommendations, and recruiter specialties to generate matches ...